
I can't remember what inspired this idea, whether it was another craft blog or photo site or if I came up with it on my own, but I've had it in my head to do for at least 3 Christmases now and I'm finally following through. As I posted yesterday, Pick Your Plum ran a deal on sets of 9 - 1.5 inch wooden cubes, which after shipping came to about $6.75 a set. I had half a 16 oz bottle of Mod Podge left over from last year or the year before, finally bought a bone folder, and 21,000+ photos to choose from, so this year seemed as good as any to make some photo blocks.
Tools needed:
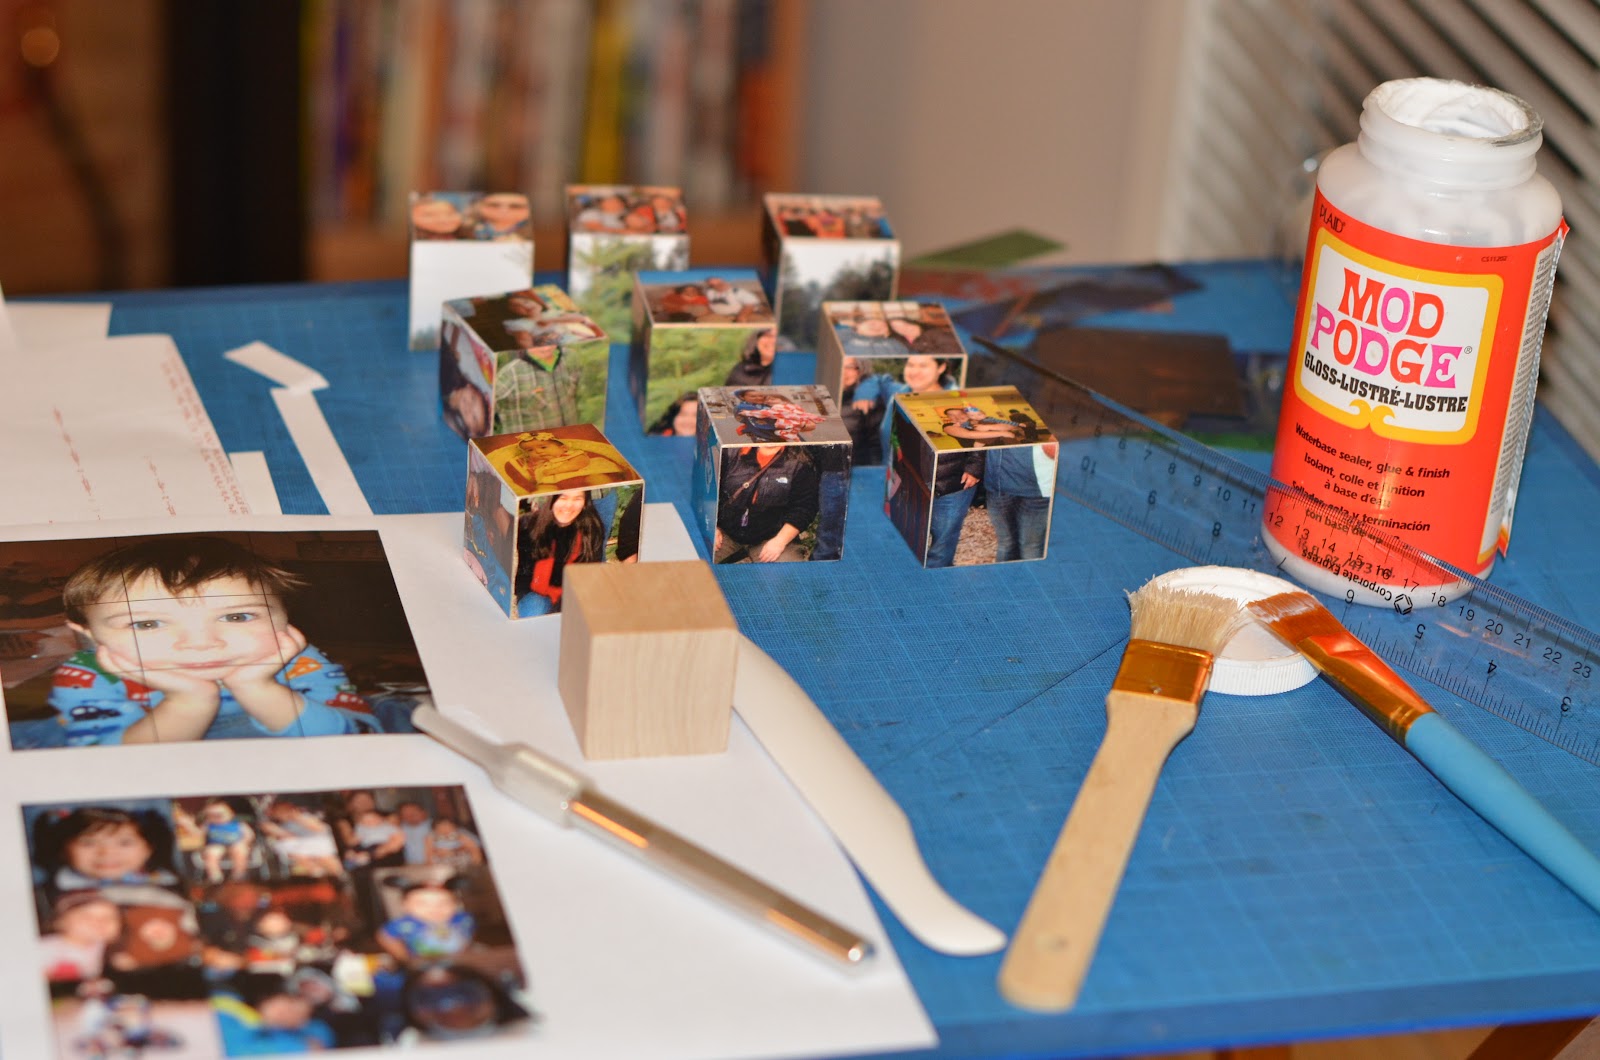
Mod Podge - or other glue that drie clear.
Exacto Knife
Bone Folder - for smoothing out the photos on the blocks and making sure the edges stayed down.
Ruler
Paint Brushes - I usually like to use foam brushes to apply glue, but I couldn't find my supply so I used a combination for fine bristle and coarse bristle brushes. I found that I liked the texture of the coarse bristles for the top coat, but I the fine bristles were nicer to adhere the photos to the blocks.
Photos - Since these will be Christmas gifts for family, these are themed sets personalized to the recipient. The pyramid of cubes is the set for my sister-in-law. The wedding was a couple of years ago so I can still use pictures from the wedding for personalized gifts.
Steps:
1. Choosing Your Pictures:
This is the most time consuming part of the project for me. The minimum number of photos you will need is 6 (one large photo per side) and the maximum needed for a set of 9 cubes is 54 for all single photos. I like puzzles so I decided to do three large pictures (4.5 inches squared) that use each of the 9 cubes to make up the picture. On the other three sides, I would do random small pictures (1.5 inches squared). So I needed 30 photos total.
 |
| The top photo is one of the large photos. As you can see the one photo is cut into 9 pieces, one for each cube. The bottom photos are 9 single photos. |
It's helpful if you create a template. Since my photo block were 3 cubes by 3 cubes, which are 1.5 inches cubed, my template was a 4.5 inch square grid, made up of 9 - 1.5 inch squares. I made the lines as skinny as possible and a dark grey and kept it in the forefront. This will help when you cut the pictures - you can still see the lines, but they don't stand out so much when you glue the pictures to the blocks. When I edited the pictures for the large pictures, I tried to avoid having eyes fall on the lines, ie become bisected by two blocks.
3. Printing and cutting:
I printed on both glossy (brochure paper) and regular copy paper. I didn't want to use photo paper because I didn't want to use thick paper. I used the ruler to line up agains the grey lines of the template and used an exacto knife to cute the pictures out into 1.5 inch squares.
4. Glueing the Pictures to the block:
At first I used only the coarse bristed paint brush (about 2 inches wide), but its a cheap brush and small pieces of the bristles would sometimes stick to the cube and I'd have to take it off so it would create bumps on my pictures. So I started using the fine bristled brush to coat the one side of the block with Mod Podge. I'd then place my 1.5 inch square photo on the cub, use the bone folder to smooth out the picture and apply pressure to the edges to make sure there were no dog ears. Also, if you picture is just a little to big on any side, you can use the bone folder to fold the extra paper over to the next side.
5. Top Coat:
I used the coarse bristle brush to pain on a top coat of Mod Podge. When I switched to the fine bristle brush for the base coat, I found that the fine bristles did not leave as musch texture on the top coat, so I switched back to the coarse bristle brush for the top coat. I like I can feel the brush strokes on pictures, but if you want a smoother look, go with the fine bristles for the top coat.
6. Let Dry and Viola! Photo cube. Repeat 6 times per cube and you're done.

I would do two - three sides of a set each night because I liked to let the sides dry a little before going on to the next side. You could do 5 of 6 sides one night and then the last side the next night or a few hours later. Also, I am thinking of lightly sanding the sides and apply a second coat of Mod Podge, but for now these are good enough. If I have time and think they need them, I'll apply a second coat closer to the holidays.
Later this week, maybe even tomorrow, I'll have worked out all the kinks to my candle holders and can post my tute for those.
Until then, Happy Crafting!
Check out these link parties for more inspiration:
Clare's Room's Under the Christmas Tree
Kootoyoo's My Creative Space
And

No comments:
Post a Comment